
Getting started
Install
- In WordPress, go to Plugins → Add New Plugin and search for TierStep.
- Click Install Now, then Activate. WooCommerce must be active.
You can also download TierStep from commercewp.com and upload it under Plugins → Add New Plugin → Upload Plugin.
Create your first campaign
- Go to Products and edit a simple or variable product. Make sure it has a regular price.
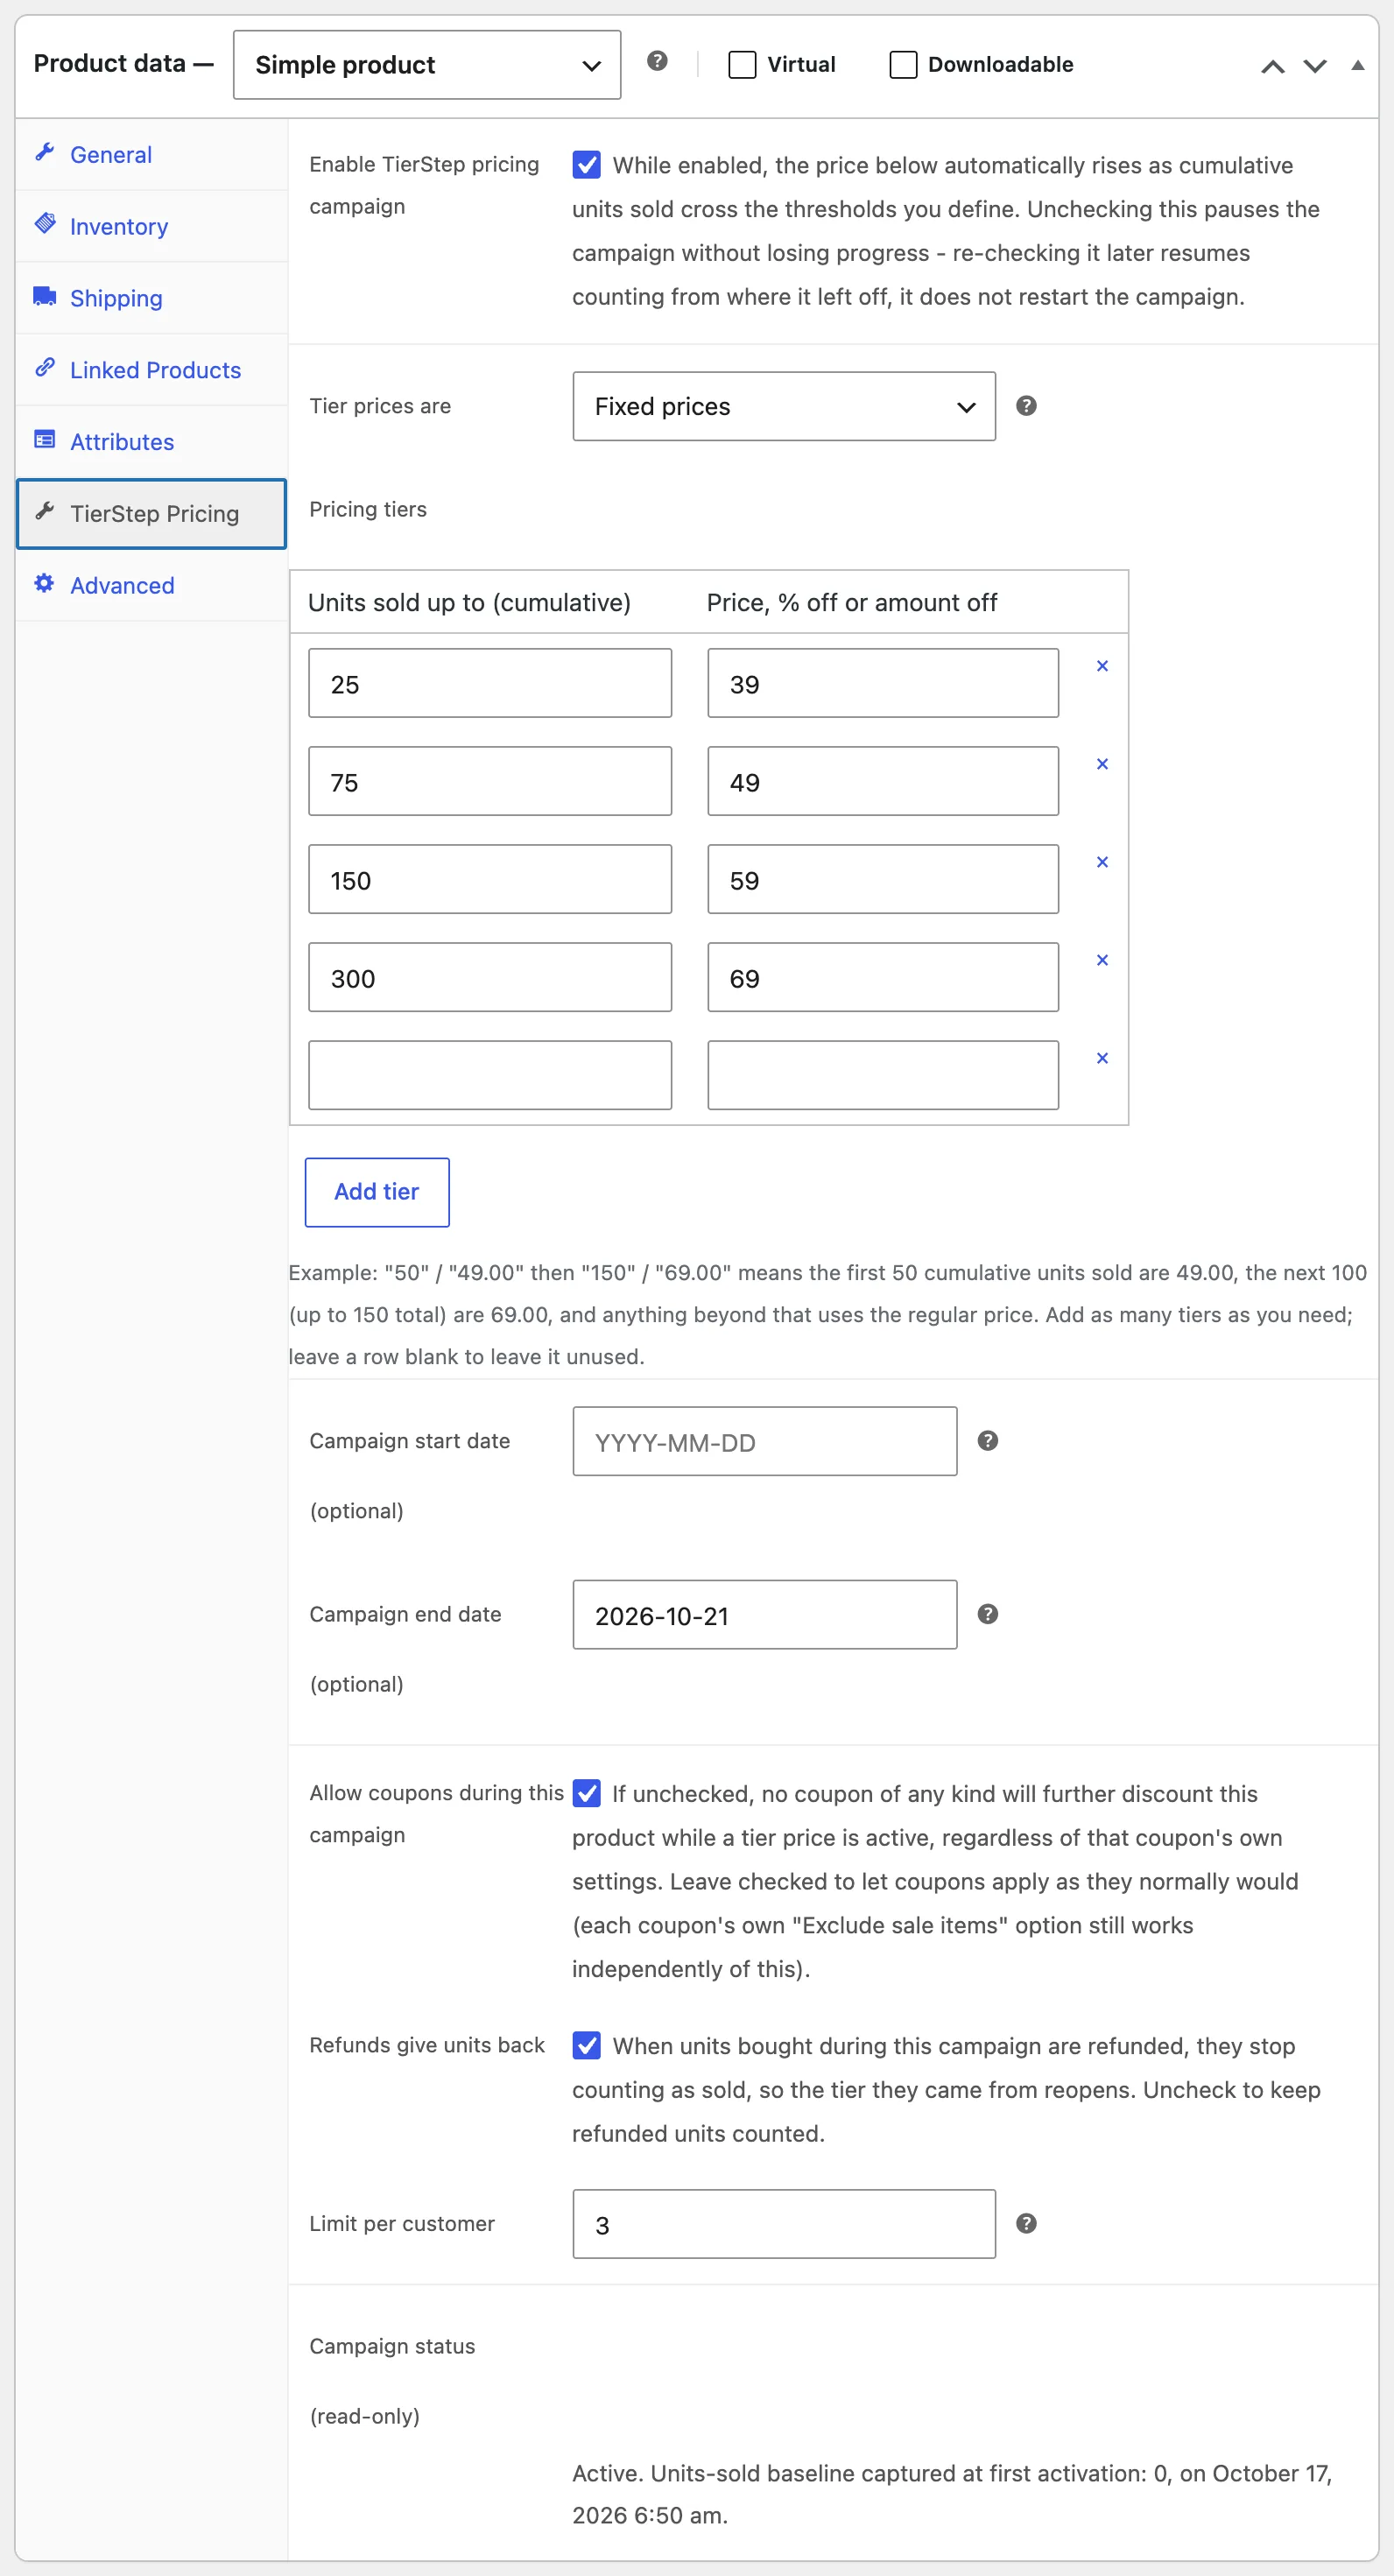
- In the Product data box, open the TierStep Pricing tab.
- Tick Enable TierStep pricing campaign.
- Leave Tier prices are on Fixed prices.
- Add your tiers. Each row is "units sold up to" and the price for those units:
25/39→ the first 25 units cost 3975/49→ units 26 to 75 cost 49- Use Add tier for more rows.
- Optional: set an end date, a limit per customer, and whether coupons can be used.
- Click Update.
After the last tier, the product goes back to its regular price automatically.
Check it on your store
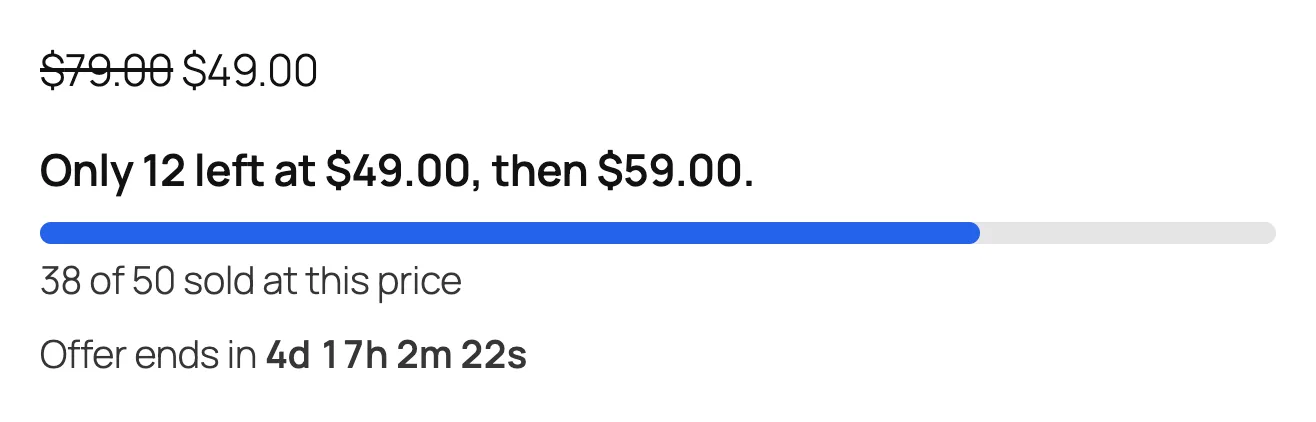
Open the product page. Under the price you'll see how many units are left at the current price, a progress bar and, if you set an end date, a countdown. The tier table appears after the Add to cart button.
Good to know
- Counting starts when you first enable the campaign. Earlier sales don't count.
- Pausing keeps progress. Untick Enable, and tick it again later to carry on where you left off.
- One order can't jump a tier. If 3 units are left at the current price, a shopper can add at most 3 to the cart.
Next: Tiers and price modes